KiCad has an open source library, which is one of the advantage of it. Every week, KiCad’s library is updated through GitHub from KiCad. This article is dedicated to show how to install additional libraries for KiCad, and adding third-party libraries such as Digi-Key or Sparkfun Electronics for example. Digi-Key and Sparkfun’s libraries can be accessed through the links below:
- SparkFun Library: https://github.com/sparkfun/SparkFun-KiCad-Libraries
- Digi-Key Library: https://github.com/digikey/digikey-kicad-library
As an example, this article will show how to add Sparkfun library on KiCad 5.0.0 for Ubuntu 18.04
Cloning the Library via GitHub
Library can be accessed through Github, where almost everyone can share their library and contribute to the open source library in GitHub. If there are new additions in the library, the version renewal using Git will be much easier and won’t take much hard disk space, as only the additional files will be downloaded and not the entire files. to download Sparkfun library in GitHub, make sure you have the git package and execute the command below:
$ git clone https://github.com/sparkfun/SparkFun-KiCad-Libraries.git
After you finish the download, you can see several folders which contained Library and other supplementary folders, and also additional files. The result of downloading the library is as shown in Picture 1

Adding the Library in KiCad
After downloading the library, the next thing is to open KiCad program to add the downloaded library. But before that, make a new Project by using File > New > New Project
Access “Environment Variable Configuration” in Preferences > Configure Paths. Add new Environment Variable using the “Add” button, then give the name “KICAD_SPARKFUN_SYMBOL” and show the folder location using the “Browse” button.

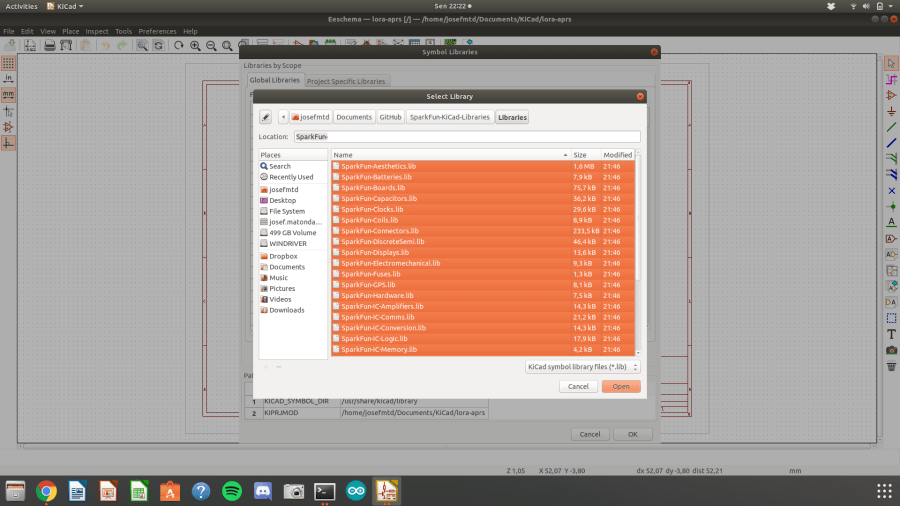
After adding Environment Variable, open Eeschema (Schematic Editor) and open Preferences > Manage Symbol Libraries. Press “Browse Libraries…” and select all desired library before pressing open
Open Pcbnew (PCB Layout Editor) and open Preferences > Manage Footprint Libraries. Then, press “Browse Libraries…” and select all .pretty folders which you want to add before pressing “OK”

That’s all about adding libraries to KiCad. Next time, I’ll talk about creating a simple PCB design using KiCad. Have fun trying KiCad!

Thanks Josef, this is exactly what I needed to add some libraries I found on GitHub. I couldn’t this so clearly explained in the official documentation
LikeLike