Bluetooth is one of the simplest communication modules which can be bought at a relatively cheap price. HC-05 Bluetooth Module can be easily found in many online shop websites around fifty thousand rupiahs. Before we further out discussion, I’ll talk about several Bluetooth basic concepts
Introduction
Bluetooth is a wireless technology standard for short-distance communication. Bluetooth uses 2.4 GHz frequency, which is a free-to-use frequency channel, with a low power limitation. Bluetooth standard encompasses quite a lot of protocols, one of which is RFCOMM Protocol. The Bluetooth Module which we usually find normally uses this protocol. RFCOMM Protocol is pretty popular because there is a lot of APIs available using this protocol. In addition, this protocol, commonly called as Emulation Port, can be integrated to many applications using RS-232 as its communication interface
Generic Bluetooth RFCOMM Modules
After knowing several of Bluetooth basic concepts, it’s time to see how Bluetooth works directly. For this demonstration, I’ll try using Bluetooth Module: Tokopedia (Disclaimer: No intention of promoting).
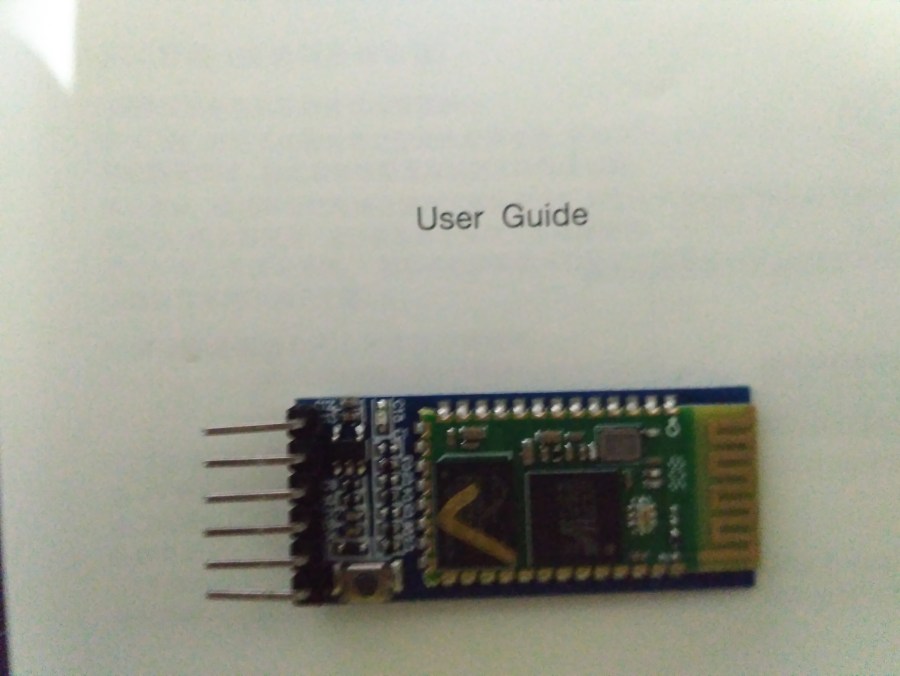
The Bluetooth Module as depicted in Picture 1 is a Module based on Bluetooth Chip BC417. This module has several output pins such as STATE, RX, TX, GND, +5V, and EN. To use this module, it’s enough to connect the RX, TX, GND, and +5V pins.
The 5V pin, or VCC Pin, in this module is actually connected to the LDO Voltage Regulator in this Bluetooth Module Board. I tried to see what kind of Regulator is being used, but it’s pretty hard to find a datasheet for this SMD component. Before I talked about how AT programming commands are, I’ll test the serial port using this Bluetooth Module first
Connect the Bluetooth TX pin with RX Raspberry Pi, RX Bluetooth with TX Raspberry Pi, VCC with +5V Raspberry Pi and GND with GND Raspberry Pi. I’ll turn on the minicom to open the serial port (/dev/ttyS0) using baudrate 9600. The test display result should be as shown in Picture 2

AT Commands Bluetooth
After finished testing the Serial communication, the next thing to try is the AT Commands. Several configurations such as Bluetooth name and PIN and also baud rate could be done through AT Commands. To do that, I made a short script in Python to execute this function. Before trying this script, make sure Raspberry Pi had been installed with Python and PySerial package (python-serial)
# apt-get install python-serial
Before I give the source code from AT Command Configuration, it’s important to know that entering AT commands can be done in three ways. The first is to give 3.3 Volt input to the 34th pin in the Bluetooth Module. This will make the module enter a Full AT Commands mode, where all AT Commands can be accessed and baudrate from the module is 38400. The second method is by pressing a button before the module turned on and make sure the button is still pressed as the configuration process continues (this is effectively similar to the first method), which makes the module enter a Full AT Commands mode. The third method is that after the module is turned on, press a button on the module and keep it pressed when doing the configuration. The module will then enter a Semi AT Command mode where the baudrate is still the normal serial communication baudrate (9600 baud default). If you forgot what baudrate you had set for your serial communication baudrate, it’s better to program your Bluetooth in Full AT Command mode
# attest.py
# Sending AT commands to Bluetooth HC-05

import serial
import time

bluetooth = serial.Serial("/dev/ttyS0", baudrate=9600, timeout=5)

bluetooth.write('AT+NAME=JosefMTD\r\n')
result = bluetooth.read(100)
print result

bluetooth.write('AT+UART=38400,0,0\r\n')
result = bluetooth.read(100)
print result
To use the program above, change “/dev/ttyS0” into “/dev/ttyACM0” if using PL011 Hardware UART from Raspberry Pi. Only use “/dev/ttyS0” if you’re using mini UART. Set baudrate according to the module’s baudrate or put in 38400 if you want to enter Full AT Command mode
To change the name and baudrate, Bluetooth module can be configured in a Semi AT Command mode, which is why my set of processes are to press a button, run attest.py script, and let go of the button when it finished

That’s all from me this time, leave a comment if you have a problem in setting up the Bluetooth
